ALL TUTORIALS
ALL TUTORIALS

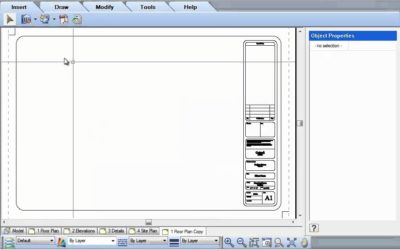
Using different sizes of title blocks (Video)
Editing Title blocks Video: https://www.youtube.com/embed/hayQL6_fgYc Instructions from Video: The titleblocks that are automatically associated with your worksheet space in Envisioneer are24x36 pieces of paper but these sheets can be any size that you want to...
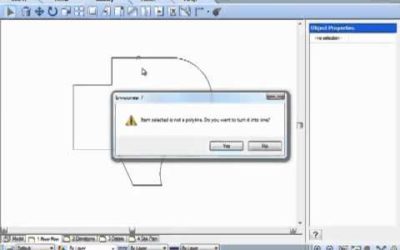
Join Polyline (Video)
Join Polyline allows you to select a combination of polylines, lines and arcs and convert them into a single polyline. If a selected element is not a polyline, you are prompted on whether you wish to convert it to one. You can continue to select additional lines and...
Copy View (Video)
Have you made a titleblock on one sheet that you want to use for all your other sheets? Right click on the view tab and select Copy View. This will create another view tab with all of the same content as the original -- duplicating your titleblock onto another view...
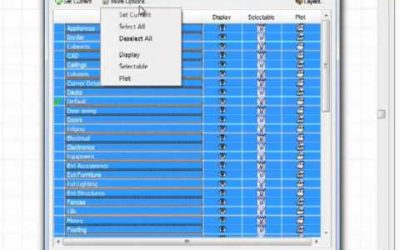
Layers (Video)
The Layer functionality has been upgraded with several improvements watch the video to see the great new enhancements!
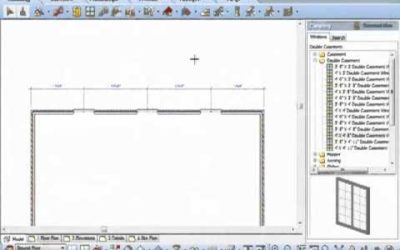
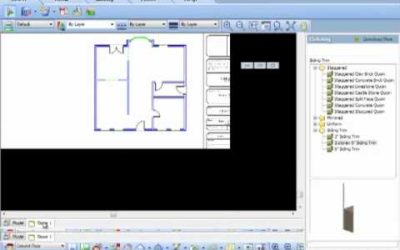
Substituting a Product (Video)
Direct Product Substitution
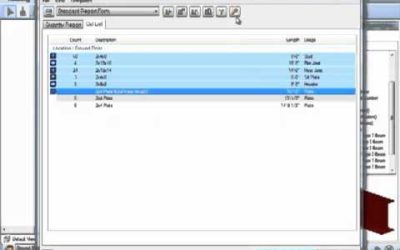
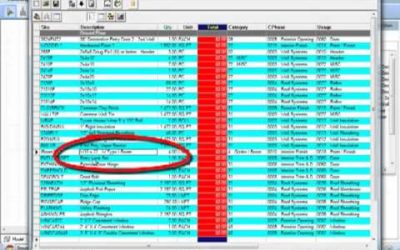
Cut Lists (Video)
The new cut list optimizer is entirely new and replaces the existing cut list routine. This new approach to optimizing cut lists presents the results in a much more intuitive manner. Purchased member item lengths are displayed in the Cut List tab, but now each length...
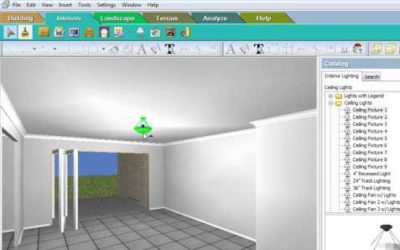
Lighting For Renderings (Video)
This is a 3 part video series on rendering. Part 1 is on Lighting and the dramatic role that lighting plays in a good rendering. We will discuss the natural lighting in a scene and how to change the light levels in a room to change the rendering.

View Types (Video)
In the Envisioneer there are many different ways that you can view and subsequently print your model. The Display Mode tool slips the model into; Wireframe mode -- a more technical look at the model Hidden Line --great for printing when you are not sure of colour...

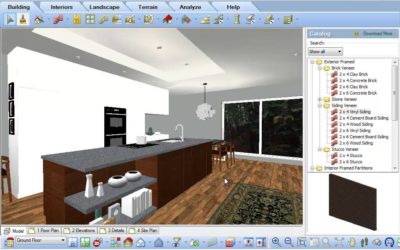
Materials for Rendering (Video)
Elements in an Envisioneer model have materials applied to their surfaces. Every material has finish properties that determine how much the material reflects, emits and absorbs light. These factors can affect the rendered scene.
Room Dimensions (Video)
Do you want to include the Length x Width dimension in a room? Go to Tools-Dimensions-Room Dimensions. With your cursor indicate the width and then the length of the room and it will display corresponding text in the middle of the room for you. Hope that makes your...
Replace Text (Video)
Did you specify one product in your notes and now need to replace it with a different product? Don't scrap the notes, replace the text. Select Tools/ Text /Find and Replace. Type in the current text and then type the replacement text. You can do this in Model space,...
Overall Dimensions (Video)
Select a series of dimensions and the new Envisioneer 7 will combine them for an overall dimension - quick and easy dimension edits.
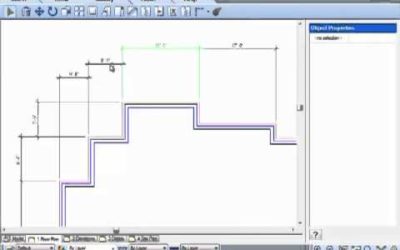
Align Dimensions (Video)
The Align Dimension feature is very handy for lining up a series of dimensions with each other. Simply issue the command, select the primary dimension, and then select the additional dimensions you wish to arrange in line with the primary dimension. The Align...
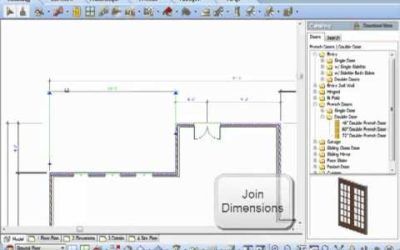
Joining Dimensions (Video)
Another great new feature for version 7!
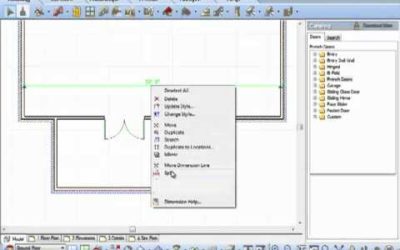
Split Dimensions (Video)
In Envisioneer 7 you can split dimensions previously inserted so you can pick new dimension points.
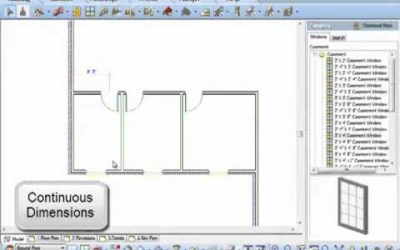
Continuous Dimensions (Video)
New feature in Envisioneer version 7. Watch the video to see how this new feature works.
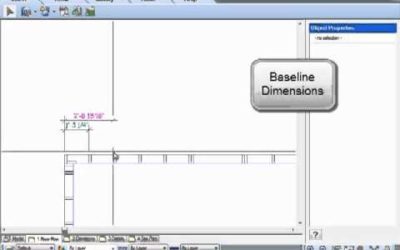
Dimensioning from a Baseline (Video)
Baseline dimensions prompts you to select an extension line to start from, then proceed to enter continuous dimension strings all located from a base starting point. The dimension line offset variable controls the spacing between dimension lines.
Suppressing Units in Dimensions (Video)
Leave off or turn on the 0's in your dimension strings.
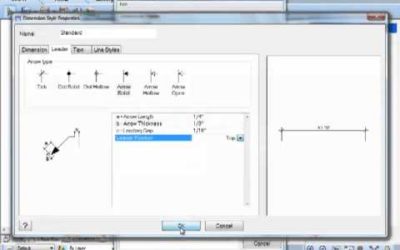
Text with a Leader (Video)
Leaders can now be justified to the top, bottom or middle of text as a preset.
Depicting Insulation (Video)
Do you need to depict insulation in a wall? In Model view go to Tools-Layout-Details-Batt Insul. In Worksheets go to Draw-Details-Batt Insul. Left click to show where it starts, left click again to show where it stops and left click again to show its thickness. Great...
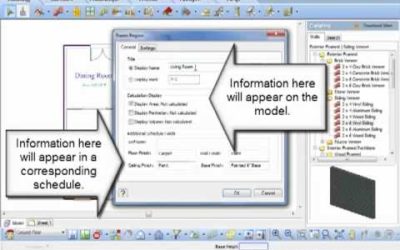
Room Regions (Video)
Do you want to create a Room Finish Schedule and simultaneously label each room with added info such as the area, perimeter and volume of the room? Go to Tools-Analyze-Schedules-Room Region by Room. Type in the name of the Room, the corresponding information that you...
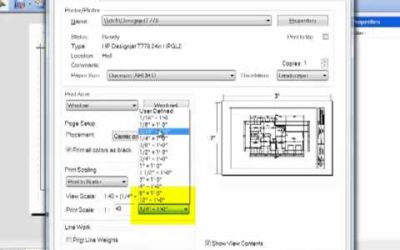
Printing to Scale (Video)
The Print Scale and View Scale are independent for text printing ease.
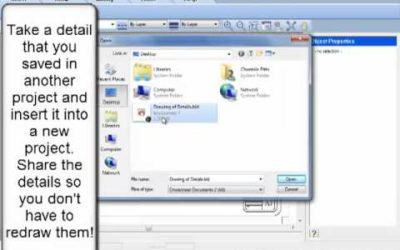
Creating a block (Video)
Have you created a really great detail in an Envisioneer project and want to use it in another project? In Worksheet mode, go to Insert-Blocks-Insert Block from File. This utility will allow you to pick an Envisioneer project and open a block that was saved in that...
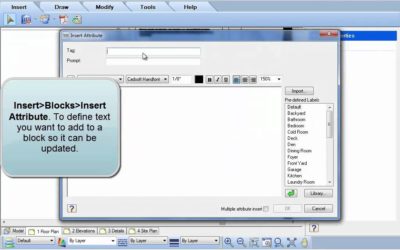
Attributes (Video)
Do you have a customized titleblock with text that you update each time you start a new project? Think about using attributes, attributes allow you to attach textual information to blocks that can be updated through a handy dialog box. In Worksheet mode go to...
Adding a Logo (Video)
You can customize your printed worksheets by adding in your company logo. Go to Insert-Import Image. From your hard drive find a jpg,bmp or tga file of your company logo. You can resize it during the insertion process. Hope that makes your Envisioneer work, one step...
Labels (Video)
Do you want to add text to the predefined labels list in the text tool so it reflects your most common text choices? Select Files-Catalogs-Library Manager. Under the Libraries pull down menu, select Labels. Right click to Add, Edit or Delete labels. Once you exit the...

Selecting New Title Block Sizes (Video)
The titleblocks that are automatically associated to your worksheet space in Envisioneer are 24x36 pieces of paper but these sheets can be any size that you want to specify. Part of your default catalog with Envisioneer includes a number of various sizes of...

Batch Printing (Video)
If you have a number of drawing sheets to print out, Envisioneer can do them all at once. Select File-Batch Printing. In the Batch Printing dialog box, you select which sheets you want to print and uncheck any that you don't. You have the print information displayed...
Driveways, Paths and Roads (Video)
Inserting driveways, paths and roads are a breeze following the directions of Australian Envisioneer Distributor Don Cable.
Walkout Basements on a Sloped Terrain (Video)
Tin Terrain and Walkout Basements. Cadsoft software incorporates TIN terrain where exact spot levels can be inserted. The Spot Point command allows you to manually insert specific points by specifying X,Y,Z coordinates. Using the commander you can change the Z...
Inserting Lights and Wiring Diagrams (Video)
Don Cable, the Australian Distributor of Envisioneer profiles the interactive lighting and electrical diagram capabilities in Envisioneer.
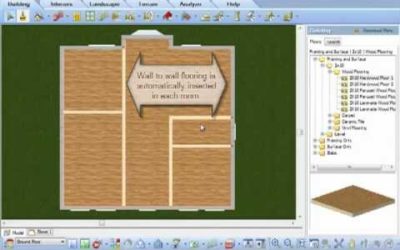
Automatic Floors (Video)
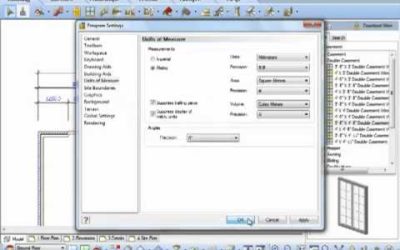
Automatically as you create a room in Envisioneer a floor will be inserted. This floor will span from wall to wall of that room and its purpose is to represent finish floor materials in each of the rooms. If you do not want automatic floors, go to Settings-Program...
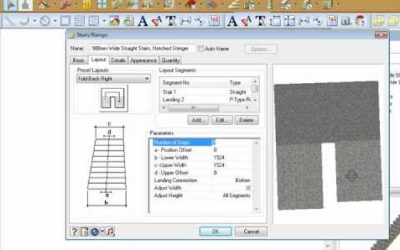
Inserting Stairs (Video)
Stairs Video: https://youtu.be/9fDCOTzR1fU Instructions from Video: Select Insert>Stairs/Ramps or select the Stairs icon. The catalog has a variety of stair styles and widths ready to insert. Let’s first insert a straight stair and review the information on that...
Floor and Ceiling Framing (Video)
One dialog box allows you to make many specifications, cutting down on your time!!
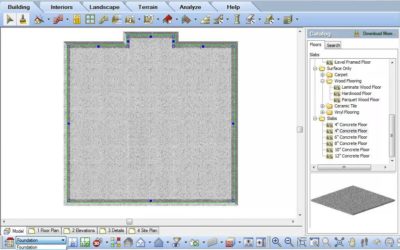
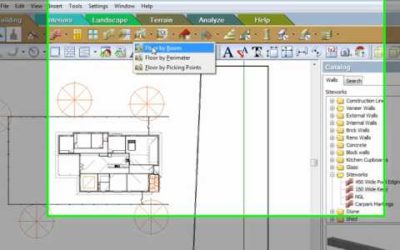
3 Ways to Insert a Floor (Video)
There are 3 different methods to insert a floor in Envisioneer. Floor by Room will find the enclosing walls in a space and place a floor within that room. Floors by Perimeter will find the exterior walls in a building a place a floor inside the entire interior of the...
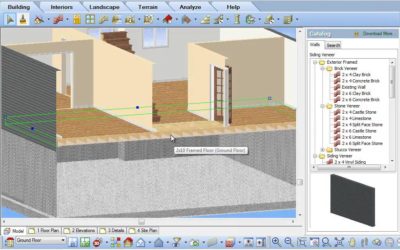
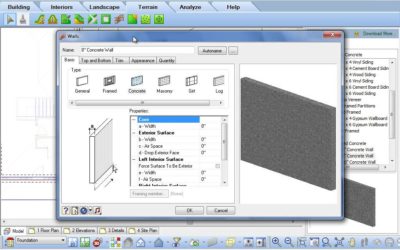
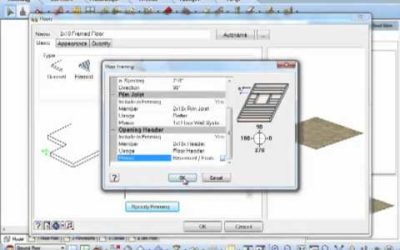
Convert Framing to Members (Video)
When you insert a floor the floor can can consist of the flooring material, floor sheathing and the floor joists. By editing a floor you can determine the thickness of the materials it has specified, if any and the framing materials, spans and directions. All of these...
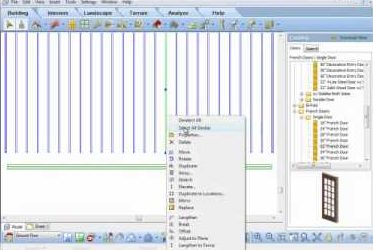
Lengthen Member (Video)
Have you have inserted a series of members, as an example joists, and then need to make all of them longer or shorter? Select one of them, then right click and select Select All Similar, to select all joists, now right click again and select Lengthen to Fence. Left...
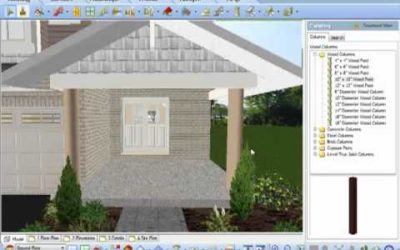
Tapered Columns (Video)
Added flexibility for your designs with the new tapered column feature.
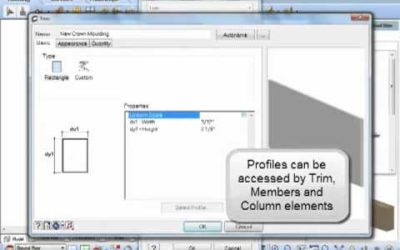
Convert a Polyline to a Member Profile (Video)
Convert a closed 2D shape to a profile used for members and trim.
Adjust Member to Plane (Video)
Once a member is inserted it can be adjusted to match the plane of another surface. For example, you insert a frieze board and want to align it to match the gable end of a wall. Left click to select the board, right click and select Adjust to Plane. Left click on the...