Importing CAD Files in Model View
Personal Architect | Pro Architect | Building Essentials | Construction Suite
The Import CAD File tool lets you bring an AutoCAD DWG or DXF file into your project as a 2D image. You may, for example, want to bring in a drawing sheet border, title block, drafting symbol, or detail. You can define the size and angle of the imported block prior to importing it.
To import a CAD file in Model View:
1. In Model View, select Tools > Layout > Import CAD File. You can also select File > Import > Import CAD File.
2. In the Open dialog, select the type of file you want to import from the Files of type drop box.
3. Select the file you want to import, then click Open.
4. In the Component Options dialog, specify how you would like colors and linetypes to be displayed. If By Layer is selected, the resulting image will use the colors and linetypes assigned to the layers of the CAD drawing. If By Color is selected, it will use the colors and linetypes of individual entities in the CAD drawing.
5. Click OK. The image is displayed in the Import dialog. You can zoom and pan in the preview pane using the zoom/pan controls below the pane. Note that changing the zoom level inside the preview pane has no effect on the image when it is imported.
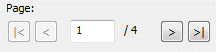
6. If the document has more than one page, navigate to the page that you want to import by clicking the buttons in the Page area of the Import dialog.
7. Before importing the image you will need to define the size or scale of the imported image.
Initially, the size of the image is the same as the size in the CAD file. You can set a custom size by editing the values in the Width and Height edit boxes. When you do so, the Scale values adjust accordingly.
If you are importing a floor plan and you know the scale at which it was drawn originally, you can enter that value in the Scale edit boxes. For example, if the plan was drawn at a 1/4″ = 1′-0″ (1:48) scale, you would enter 48 in the Scale (X) or Scale (Y) edit box. There are separate X and Y (horizontal and vertical) scale settings. By default, whatever you enter in one edit box will automatically be displayed in the other edit box, maintaining the same scale in both directions. If you want the X scale to be different than the Y scale, you need to click the lock icon beside the Scale (X) and Scale (Y) edit boxes. With the lock ‘unlocked’ you can enter a different value in each edit box.
Another way of specifying the scale is to draw a reference line along an existing object in the CAD image and specify the length of that object in real-world units. To do this, click the Pick Scale button next to the Scale (X)or Scale (Y) edit box, then pick two points along an object in the CAD image to define a reference line. (If the X scale and Y scale will differ, you should pick points along a horizontal object for the X scale, and pick points along a vertical object for the Y scale.) Then in the Scale by Reference dialog, enter the length of the reference line and click OK. For example, if you know that a particular wall in your plan is 12′ long, draw a line along that wall and then enter 12′ in the Scale by Reference dialog
The Scale values in the Import dialog will then adjust to reflect the scale you defined.
8. To specify the angle of the imported image, enter a value in the Angle edit box, or click Pick Angle button next to the Angle edit box and pick two points along an object in the CAD image to define the angle. If you are picking points to define the angle, the Angle by Reference dialog appears and reports the angle that you defined. You can edit the angle here if you want.
9. If you want to import only a portion of the image, click under the Crop Box option, then click two points diagonally in the preview window to define a box around the portion that you want to import. A blue box is displayed around the selected portion. To remove the crop box, click, then click OK to confirm that you want to clear the crop box.
10. To dim the imported image, slide the Dimming slider to the desired dim level. The higher the percentage, the more dim the image will be.
11. If you want the Import dialog to appear again after you insert the image so that you can insert another image, enable the Multiple Insert check box.
12. To import the image into the current view window, click Insert. The image is attached to your cursor.
13. Position the image where you want it, then click to insert it.