Installing Envisioneer
This article provides instructions on installing, starting and authorizing your Envisioneer software.
Attention Previous Users
If you currently have an earlier version of Envisioneer installed on your system, we recommend that you uninstall it before installing the latest version. Before doing so, you should back up any customized work that you have done. The uninstall process provides you with the option of keeping existing catalogs and materials on your system in case you need them.
See the following article: Saving Folders before Uninstalling.
Installing the Program
Follow the steps below to install Envisioneer software on your computer. Make sure you exit all other programs, applications and screensavers before installing.
To install the program:
- Make sure your computer meets the minimum requirements outlined in the System Requirements article.
- To install from a downloaded file, double click the installation file that you downloaded. The setup begins loading.
- To install from a DVD, begin at the Windows® desktop. Insert the installation CD into your CD-ROM drive. The setup begins loading.
- Please wait while the setup loads. Follow the onscreen directions to install.
- The installation process will create an icon on your desktop to start the software. Double click on the icon to begin.
Activating the Program
The Activation window appears when you start Envisioneer for the first time, and will keep appearing at startup until you have activated the program.
If you do not want to activate the program right away you can click the Run Trial button to run in trial mode. Trial Mode is a 30-day evaluation period in which you have full access to all features of the program except Print and Export. Once this period has ended, you need to activate the program to be able to run it. You can activate the program at any time during the Trial Mode period.
To activate the program:
- Click the Activate
- The Software Activation dialog box will appear.
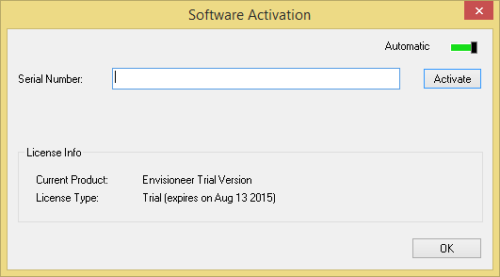
- The Activation system will automatically authorize the software if you have internet connection. In the upper right corner of the dialog box it reports Automatic with a green line if it can detect an internet connection. By typing in your provided Serial Number (See your download instructions email) and clicking Activate you will automatically authorize your software.

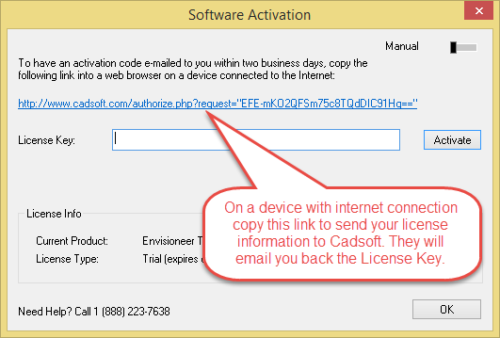
- If you don’t have internet connection it will start a manual authorization process. You will need to email [email protected] the necessary information found on the link provided on the Software Activation page. The Admin team at Cadsoft will email you back a License Key that you can type in.
- The Activation system will automatically authorize the software if you have internet connection. In the upper right corner of the dialog box it reports Automatic with a green line if it can detect an internet connection. By typing in your provided Serial Number (See your download instructions email) and clicking Activate you will automatically authorize your software.

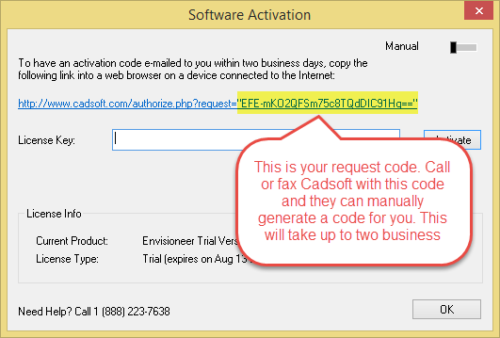
- If you can’t obtain internet connection. You can call Cadsoft to obtain the code. You must provide them with the request code as illustrated in the following screen capture.

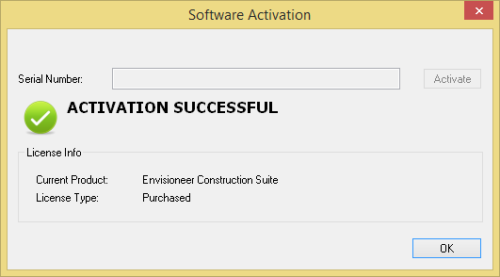
Once you are authorized in any of the 3 methods you will see “Activation Successful” and your purchased product and license type will appear. Click OK to use the software.

Using the Software
One of the best ways to get to know Envisioneer is to watch any of the other videos available in the Center section of the website.
When you’re ready to start working with the software, we recommend going through the Quick Start Guide, which steps you through the completion of an actual project, and teaches you how to view and navigate. You can access the guide under Help> Quick Start Guide in Envisioneer.