Once you have created a model in Envisioneer that is ready to be shown off on your website or sent to a client, you need to create the visuals.
Select View>Render 3D RealView for static images like the front elevation or the floor plan. Where the camera is focused it creates a rendered view, so you can create a variety of images just by inserting different cameras.
Creating 360 Views
For 360 views, select View>Render Panoramic View. This command will render images in a 360 radius around the position of your camera and seam them together for a full 360 view. When the rendering is complete you upload it to the HomeViewVR app.


Once on the app, you can share it via a HTML code snippet. That code snippet is what is used to share it on a website. Copy that snippet to your site so you can see the 360 views.
Update those views as many times as you need to, based on the customer feedback that you get. If they do not like the purple velvet sofas anymore, redo the 360, just click that button and recreate it. These images should change and evolve from the information you get from your website.
Building your own imagery for a customer experience show home website is a powerful way to market your homes with the flexibility to update whenever you require.
Working inside HomeView VR
Once you have uploaded a project using the Generate Panoramic View feature in Envisioneer, you will be able to view it in the HomeView VR App, available free from the Google Play Store and Apple iTunes Store:
-
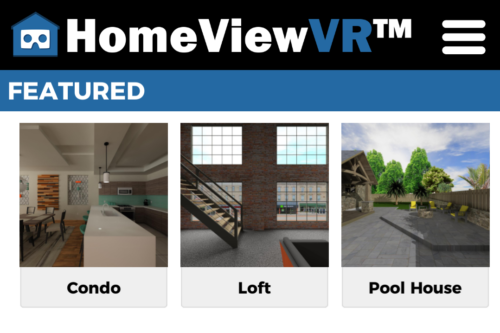
- Open the HomeView VR App. The first time you open it you will notice that there are three sample projects created by Cadsoft for you to view.
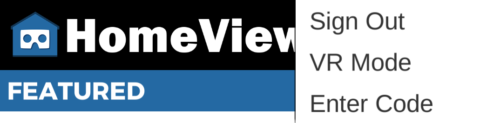
- To Log In select the Menu button in the upper right corner, and select Sign In from the drop-down menu.
-
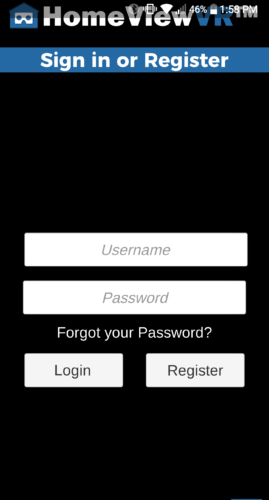
- On the Sign in or Register screen enter your Cadsoft online community Username and Password, then click the Login

-
- You will now see your uploaded project listed under My Projects above the sample projects.
-
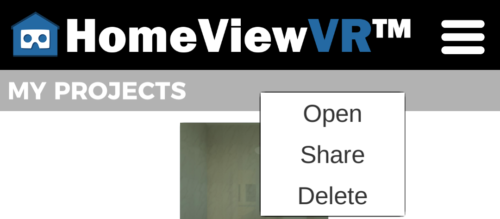
- To open your project select it and choose Open.

- To open your project select it and choose Open.
- On the Sign in or Register screen enter your Cadsoft online community Username and Password, then click the Login
6. To look around inside the Panoramic View, move your mobile device around.
To access the navigation menu, point your mobile device towards the ground.
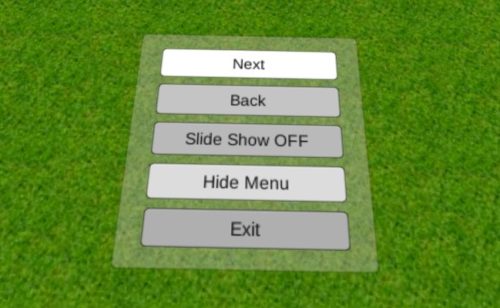
The Next and Back buttons will cycle between the different camera views within a project. The Exit button will return you to your list of projects.
-
-
- To share your project select it and choose Share
- To share your project select it and choose Share
-
-
-
- In the Share via Email screen enter the Email Address of the person you’d like to share the project with and select the Share button beside it. This can be done several times to share with multiple persons. For each person you share the project with, you will see a Project Shared Succesfully message, and the person’s email address will then appear below the YourProjectName is shared with:

- In the Share via Email screen enter the Email Address of the person you’d like to share the project with and select the Share button beside it. This can be done several times to share with multiple persons. For each person you share the project with, you will see a Project Shared Succesfully message, and the person’s email address will then appear below the YourProjectName is shared with:
-

-
-
- Each person you share the project with will receive a Code to access the project contained within the body of the email that is sent to them from the address [email protected] – in order for them to access the project they will first need to download and install the app on their mobile device.
-
NOTE: They do not need to register for the Cadsoft online community to use the app or access your project. Once they have the app open, they will need to select the Menu button in the upper right corner, and select Enter Code from the drop-down menu.
-
-
- On the Get Shared Project screen that opens they need to enter the Code that was sent to them in the email.

- On the Get Shared Project screen that opens they need to enter the Code that was sent to them in the email.
-

-
-
- Once the code is processed and the project is retrieved, they will see it in the list of projects under Shared With Me.

- Once the code is processed and the project is retrieved, they will see it in the list of projects under Shared With Me.
-

-
-
- To open the project they need to select it and choose Open.
-
-
-
- To remove someone’s access to a project, you will need to remove their email address. To do so, perform the same steps listed above in Step 7 for sharing a project. On the Share via Email screen click on the Red X beside any email address under the YourProjectName is shared with: field to remove this person from your shared list.
-
-
-
- If at any point you want to delete a project from your My Projects list, select it and choose Delete.
-
NOTE: You will not be able to retrieve a project once it is deleted. You would have to upload it again using the Generate Panoramic View feature in Envisioneer.