Specifying Assemblies
At the bottom of the Quantity page you will see an Assemblies area. Assemblies are parts or materials that are associated with an element, but are not drawn in the model. For example, doors can have hardware assemblies such as a hinge set and door lock associated with them. Walls can have assemblies that include drywall sheets, screws and paint. Assemblies are included for each element in the project estimate provided an assembly option is selected on the element’s Quantity property page.
For You to Try
For this example, we will be adding to the “Interior Door Lockset” assembly that is present in the default Master catalog that ships with Envisioneer.
- Select File>Catalogs> Element Manager. In the Element Manager dialog box, select the Door group and use an interior door that has the Interior Door Lockset assembly attached.
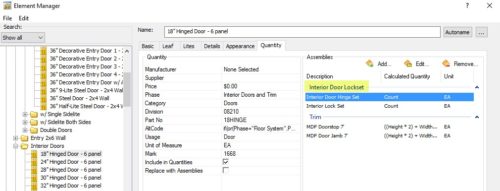
- Click the Edit button in the Assemblies area of the Quantity page.
The Assembly dialog appears.
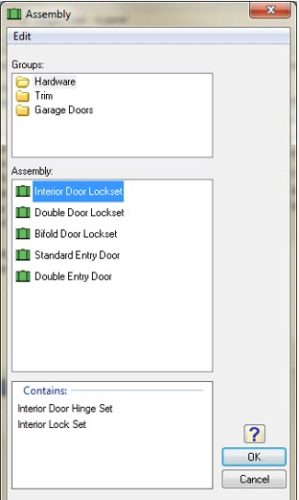
- Select the Hardware group and then select Interior Door Lock Set in the assembly list.
- Right-click the Lock Set item and select Edit Assembly. The Edit Assembly dialog box appears.
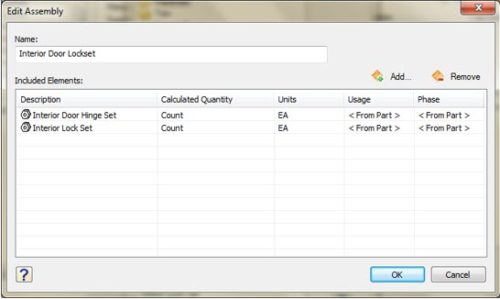
Notice that the assembly contains two parts: a hinge set and a lock set. You can add parts to an assembly by clicking the Add button, or remove a part from it by clicking the Remove button.
The Calculated Quantity column displays how the parts can be quantified. It can be by a piece Count, by their linear Length, their Area, their Volume or by creating a Formula depending on the type of part and how it is used and purchased.
The hinge set and lock set are both quantified by a Count, because there is a certain number of each per door.
- Click in the Count field of either the hinge set or lock set, then click the browse button that appears in that field. The Specify Formula dialog box appears. Notice that ‘Count’ appears in the top window of this dialog. This is a simple formula for quantifying this part. You can build any formula by adding variables, operators, functions and constants to the formula window. For example, if you were purchasing hinges individually rather than in a set, your formula might be Count*2 to report 2 hinges per door.
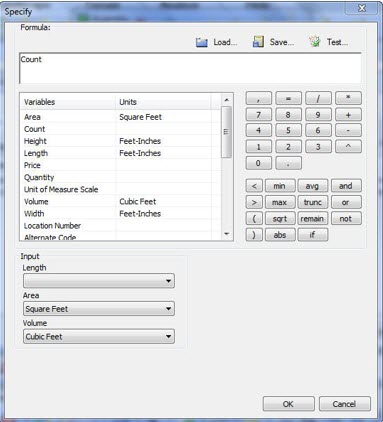
- Click OK in the Specify Formula
- In the Edit Assembly dialog, make sure that the Replace Element with Assemblies check box is disabled. This ensures that both the door and its assemblies will be listed in the quantity report. If you were to enable this check box, only the assemblies would be reported. You might want to do this if you are a Remodeler and want to add new parts to an existing door instead of installing a new door.
- Click OK in the Edit Assembly
- To add the Lock Set assembly to the door, select it in the Assembly dialog, then click OK.
The assembly and its parts are now displayed in the Assemblies area of the door’s Quantity page.