ALL TUTORIALS
ALL TUTORIALS
Import a CAD File (DWG or DXF)
Importing CAD Files in Model View Personal Architect | Pro Architect | Building Essentials | Construction Suite The Import CAD File tool lets you bring an AutoCAD DWG or DXF file into your project as a 2D image. You may, for example, want to bring in a drawing sheet...
IFC Import
Importing an IFC File Pro Architect | Building Essentials | Construction Suite When you import an IFC file, Envisioneer intelligently interprets the building and construction data and transforms it into a true 3D model comprising actual wall, door and window elements....
Plants Not Working
If you have installed Envisioneer Version 16, Virtual Architect Version 11, or 3D Architecte Version 11, the 2D Plant Library will no longer work with earlier software versions. If you wish to revert to an older version, the plant library can be restored by following...
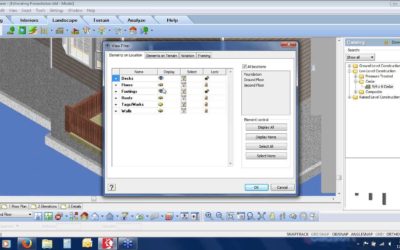
View Filter Templates
Video: https://youtu.be/XAkO4-J_NR0 Instructions from Video: In Envisioneer you can add a variety of elements to create your 3D BIM model, however, you may not always need all of these elements visible at the same time. In the View Filter you can turn specific...
Find and Replace to Update Products
Video: https://youtu.be/RRYY2KeGyHA Instructions from the video: In today’s tooltip, we will review “Find and Replace” a very handy tool that lets you replace old inventory with new skus you want to use instead. Select File>Catalogs>Element Manager. To go to the...
Coloured Floor Plans
Video: https://youtu.be/BOGdor3SjXk Instructions from the video: Creating a colored floor plan allows you to easily define a room visually in your working drawings sheets. This is a great way to present your design. You can add specific colors to each room or you can...
Adding and Editing Ramps to your Model
You can choose from a multitude of preset ramp layouts as well as edit various layout properties such as length and slope. You can insert a staircase or ramp with a single mouse click. If you place the staircase near a wall, the staircase will automatically snap to...
Collaboration and Sharing
Collaboration is the key to winning sales. In a society where everyone is socially sharing, we must offer meaningful opportunities to collaborate and elevate social posts. So how do you collaborate with your potential clients? See below for some great tools inside...
Find and Replace SKUs
Video: https://youtu.be/RRYY2KeGyHA Instructions from Video: In today’s tooltip, we will review “Find and Replace,” a convenient tool that lets you replace old inventory with new skus you want to use instead. Select File>Catalogs>Element Manager. To go to the...
Mulled Window Units
Video: https://youtu.be/5-oZMxIOcVg Instructions from Video: When you add in windows into Envisioneer the framing around that window is also added in based on the Framing Options you have set up for that location. In some designs you may have multiple windows lined up...
Custom Doors
Video: https://youtu.be/C7DQ05JtXgw Instructions from Video: The Envisioneer catalog has an extensive list of various door types and styles that you can add in but, you may want an alternate style that is not available. If you have a door that you want to use you can...
BIM Files
Video: https://youtu.be/LNJiUTQOM8o Instructions from the video: BIM Files give you the ability to import and export elements and library items from another Envisioneer catalog. You can import the entire BIM file or you can choose which elements you want to import...
Wall Properties
Video: https://youtu.be/ZsoT-CBn31c Instructions from Video: Every wall in the catalog has a set of properties that define not only the size and appearance of a wall but settings regarding framing, energy efficiency and a shopping list of all materials needed to build...
Importing New Catalog Content
Importing Custom Objects into Your Project If you have any custom 3D objects in DWG, DXF, SKP (Google™ SketchUp), 3DS,OBJ or IFC format, you can import them into your Envisioneer drawing. Many sites on the Internet offer free downloading of objects for your...
Formulas
Formulas As you insert an element in Envisioneer it will count that element and add it to the quantity report. But what if you inserted a fence and wanted it to count how many posts were needed in the length of the fence? For that, you would need to create a formula...
Building 360 Views & Collateral for your Online Showroom
Creating realistic virtual experiences on your website is important so homebuyers can make decisions from the comfort and safety of their own homes. Since the pandemic hit this has become more prevalent than ever. Cadsoft has created a sample site to illustrate the power of a virtual experience. www.cadsoft.com/360 Cadsoft can create the models and visuals for you or you can create them yourself using Envisioneer. Read on to learn how!
Roof Framing Schedule
Video: https://youtu.be/ThVkvSroehs Transcript: Once framing is inserted into an Envisioneer model it can be labeled to correspond with a schedule to be included with framing plans in a set of working drawings. For this video, we will create a roof rafter plan with a...
Cut Opening in the floor for Stairs
Video: https://youtu.be/ss1fZqK2jrg Step by Step Instructions: Once you have inserted a stair, you will want to cut the floor to accommodate the stair. In this video, we will look at the different types of floors and how to cut them. As a default, when you create a...
Standout Presentations
When marketing a space to a client, you want to convey your ideas effectively so you ultimately walk away with the job. The same is true for sample drawings that you use on your website to attract new clients. So, what makes a good modern “presentation” and how can...
ToolTip: Wall Framing Infill Settings
Video: https://youtu.be/iQ_lK2r0LJk Instructions from Video: Have you ever wondered how Envisioneer frames walls? How it knows to use a double top plate and place studs 16” o.c.? For this lesson, we will look at just that. NOTE: the ability to customize framing is...
Visual Take-offs
Technology provides great tools for designing a new home or renovated space and even viewing it in a virtual environment, but there is still a big question left on the table: At the end of the day, how much is it going to cost to build? Visual Take-offs simplify the...
Assembly Variables
Video: https://youtu.be/ATd9xWvw-98 Instructions from Video: To quantify the materials required for an element, you attach an assembly to the object. For example, when you draw a wall, you assemble the materials like drywall, mud, tape or paint in the definition of...
Dormers
Video: https://youtu.be/ewMqwnMzljY Instructions from Video: In this lesson, we will insert 3 different types of dormers and then customize the dormer roof and walls. During this, we will show you some great tips along the way like using construction lines, Offset,...
Invisible Walls
Making a Wall Invisible in 2D Video: https://youtu.be/VJF2zxT4n1Y Instructions from Video: You may find that you want to hide certain walls in 2D view, such as dormer walls and gable end walls, to improve the clarity of the view. To make a wall invisible in 2D: Select...
Base Height & Head Height
Base height Video: https://youtu.be/0cww_dlZdUM Instructions from the Video: If you have the Commander turned on, it will display a Base Height edit box as soon as an insertion tool becomes active. The value shown in the Base Height edit box is the height at which the...
Material Takeoffs and Estimates in 3D (Video)
This is a live Webinar recording of a Cadsoft software broadcast. Learn how to: - Importing a PDF to trace - Using 3D walls to include multiple materials in a single command - Using customizable Products and Assemblies - Using 3D roofing to generate accurate areas on...
Match Roof Planes
Video: https://youtu.be/SyQWeRodomk Instructions from Video: The Match Planes tool can instantly change the plane of one roof surface to match the plane of another. This is a great tool when you have uneven plate lines but you want them to share the same roof plane to...
Structural Floors
Video: https://youtu.be/AvalTGPpUPI Instructions from Video: A structural floor is a system of framing members that are inserted at the same time. Select Insert>Structural Floor>Structural Floor by Perimeter Although the structural floor is considered a single...
Left and Right Handed Doors
Video: https://youtu.be/imi8LTcMM6E Instructions from Video: From country to country or even county to county there is always a difference in the way that a door is marked as a left hand versus a right-hand door. It can lead to a good debate! Some were taught to put...
Alt Code for Material Organizing
Video: https://youtu.be/jP-VzYwzCck Instructions from Video: When you organize materials in a project estimate you may need more options for organizing the materials than what the “Phase” and “Usage” of the products offer. In this tooltip we will discuss “Alt Code” an...
Layers in Model View
Video: https://youtu.be/XOcjJXAvBNQ Instructions from Video: As a BIM model is created, each element in the model has stored settings that affect how the element will appear when it is flattened to a 2D drawing for working drawing purposes. For this tooltip we will...
Layers in Worksheet View
Video: https://youtu.be/SemTw79y244 Instructions from Video: As you draw the model in Envisioneer it is putting the various 3D elements on 2D layers so when you transfer the model to worksheet view you can control how each element will print. Let’s go to worksheet...
Adding a New Material
Video: https://youtu.be/6ODVAQvP9cg Instructions from Video: Envisioneer has an extensive collection of materials that you can choose from but you may have a specific material you want to use so Envisioneer has can import the materials too. All textures in Envisioneer...
Lengthen to Fence for Members and Framing
Video: https://youtu.be/QvCG6aO-8BE Instructions from Video: For today’s tooltip, we will review “Lengthen to Fence” feature for members. This feature allows you to lengthen one or a group of members at the same time to a new length. For our first example, select...
Managing File Size
Video: https://youtu.be/0Dx4smg8BxY Instructions from Video: Larger file sizes will increase the load time when trying to open a file. Here are some tips to manage file sizes in Envisioneer. First is the amount of custom blocks you have imported using the Import...
Roof by Surfaces
Video: https://youtu.be/zG3Xzhpfz_A Instructions from Video: The automated roof tools in Envisioneer create an entire roof, comprising of many surfaces, all at one time. The Surfaces tool creates individual surfaces. In this tooltip, we will discuss how to use the...
Walls by Baseline
Video: https://youtu.be/EbeUGAkCX00 Instructions from Video: If you use the Walls tool, the walls are drawn on a center baseline. You may prefer to draw your walls on a different baseline. For example, you may have the exterior dimensions of the walls to the finish...
Floor and Foundation Builder
Video: https://youtu.be/OW7O84xiXtI Instructions from Video: To create a new location that has completely different walls and elements than the original location drawn, use the Floor and Foundation Builder Wizard. This tool specifies the exact elements and creates the...
Flat Roofs
Video: https://youtu.be/GWG29wowL68 Instructions from Video: We will create a flat roof surface and the parapet wall. The automated roof routines allow for a sloped roof but if you are creating a built-up roof you use the Surfaces tool. This is an advanced lesson...
Roof Tips
Video: https://youtu.be/ndBCKm5E0Tg Instructions from Video There are three ways to create a roof in Envisioneer. Roof By Perimeter is used if the shape of the house and the shape of the roof match. This tool will use the exterior wall shell to put a roof around that...